Tuesday 10 July 2012

Fortune Plants

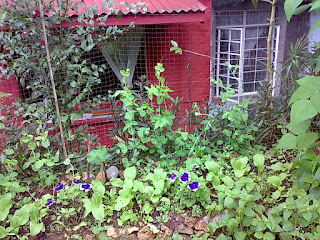
On July 01, 2012, I asked my two older nephews to cut down some Fortune plants around the south side of the property that had become tree-like in size. I planted these some years ago on a 2-feet wide space on top of an 8-feet high stone retaining wall. Some years ago, this retaining wall came down during a heavy storm and I spent a hefty sum of money just to have it fixed. It used to be a 13-feet high retaining wall. The workers had to redo the whole thing all over again but this time, they split the height and made it into 2 terraces. Starting from the bottom of the hill, it is 8 feet high and then it has a 2-feet wide space before the next terrace which is 5 feet high. The 2 terraces are slanted slightly at the tops. So to help prevent another erosion on this side of the property, I planted these Fortune plants because of their capacity in holding the soil together with their strong root system. It's just that these Fortune plants are now about 16-18 feet tall so it is time to cut them down to about 5 feet high. This is to prevent any stress on the retaining wall below especially during a windy storm. We're doing this in anticipation of the onslaught of the typhoon season here in the Philippines which comes around this month of July until late October to early part of November.

The Fortune plants behind me on the left side of the rabbitry.


Sayote or Chayote plants climbing over the Fortune plants.


The tops are heavy with Sayote/Chayote fruits and leaves.

My hubby and I spent 3 days to finish the cutting and chopping of the big pile of leaves from the Fortune plants. It was fun but we had blisters on our hands after we were done cutting leaves manually because we do not have a shredder machine. We found out that the rabbits don't care to eat the leaves of this fortune plant for some reason. They do eat most of the plants including the leaves of the banana plants that we have around our property but not the Fortune plants. So we had to cut these leaves into smaller pieces for the compost pile.


Wednesday 20 June 2012

Preserving Sweet Basil and Italian Flat Parsley

These are the last herbs and plants that are still in the garden: Celery, Sweet Basil, Flat Italian Parsley, Spring Onions and the Zucchini. The Spring Onions will be left in the garden because they seem to do well even during the rainy season. We harvest mostly the outer leaves of the Celery plants and feed these to the rabbits so the main stem remains in the ground and they grow back again. I will harvest some Sweet Basil leaves tomorrow to make some Pesto. I often buy the bottled Pesto in the grocery but they are kinda expensive. Since I already have the Sweet Basil in my garden, so I might as well make my own Pesto. I will preserve the rest of the Sweet Basil leaves in the microwave oven. It only takes a minute or two to dry them in the microwave.

How do I do it? First is to wash the leaves after I harvest them and let them drip dry. I separate the mature leaves from the more tender ones because the latter dries up much faster than the matured ones. Put a paper towel over the round dish of the microwave and arrange the leaves on the towel making sure that they are not overlapping together so each leaf will dry well. Then turn the microwave on high at 2 minutes and check the leaves for dryness. If it needs more time, do it again in small increments so as not to burn the leaves. I do the same thing with the Italian Flat Parsley. I like using the microwave in drying these herbs because it retains the color of the leaves even when they are dried. I could hang-dry the herbs in the kitchen by tying them on the stem and putting them in an airy room. It's just that there is a lot of moisture in the air at this time because it is now the onset of the rainy season here in the Philippines. I am afraid that molds will build up fast on the herbs before they dry so I'm going to use the microwave to dry them up.
Sweet Basil  

Italian Flat Parsley

Italian Flat Parsley and Sweet Basil

Celery in the forefront and Sweet Basil behind it.


Zucchini plant

Zucchini flower

Spring Onions


Tuesday 19 June 2012

Drying the Seeds

I intentionally left some Green beans to mature on the tepee trellis and on the welded wire trellis so they will dry up on the vines because I plan on using the seeds for next year's planting season. I am hoping for a few more days of sunshine this month of June so the drying process will be complete before I harvest the seeds. Even the two Okra plants which I thought will never bear fruit somehow managed to grow 2-3 pods but I left them alone to mature and dry. I am trying to keep some of the seeds from my plants now, so I do not have to buy them for the next planting season. I dried some Tomato seeds and Pepper seeds as well including the Snap Dragon seeds and these will all be kept in an airtight bottle for the next planting season. Next time around, I know not to plant my tomatoes in the garden but will plant them in pots and put them all in the patio where they will be exposed to direct sunlight for at least 8 hours. I learned not to get the leaves of the Tomato and Pepper plants wet when watering because otherwise, they easily get infected.  In drying the tomato seeds, I soaked the seeds in a bowl of water for 3 days and I had to change the water everyday. Then I drained the water out and put the seeds on a paper towel and dried them up under the sun. In harvesting the seeds of the Snap Dragon flowers, I let the flowers mature in the stalk until they turn brown. Then I simply open the brown pods and pour out the black seeds into a paper towel and transfer them into an envelope or an airtight container. The seeds of the Snap Dragon flowers are very small just like Celery seeds so you have to be very careful when opening and taking out the seeds.


Saturday 16 June 2012

Raised Garden Bed


Gardening is never really done. There is always something that has to be done to improve things or maybe it's just me wanting to play around in the garden. In the two pictures above, you will notice that the last terraced bed at the bottom of the garden has only 1 layer of hollow blocks. The top of this raised bed is lower by 6 inches from the surface of the walkway above it as shown in the picture above.  So what I did is to put another layer of hollow blocks on top of the original ones to make a two-layer hollow blocks in this raise this bed. This makes the height of this raised bed into 16 inches high from its original height of 8 inches only. It also means that I could plant some root crops such as Carrots in this raised bed when I do my crop rotation because it now has enough room for the roots to grow. The pictures below is the result of this latest work that I have done in the garden, that of increasing the height of the raised bed. You can see the difference of the older hollow blocks at the bottom of the bed as compared to the new addition on top of it.


Maybe I will start sowing my seeds by mid November so I will be able to put them out in the garden by December. Since it takes much longer for Celery seeds to germinate, I will have to start sowing my Celery seeds by October. I harvested a lot of Basil, Parsley and Celery in the garden today and fed these to the rabbits. Some are still in the garden but I will have to gather them all before the typhoons come and destroy the plants completely.  I also harvested the last tomatoes in the patio so that my work for tomorrow. I am thinking of transferring some of the Basil plants from the garden into these big tomato pots and put them under the awning so they will not become water logged if left alone in the garden beds. I'll see how the weather holds tomorrow because there is a storm coming although it is not expected to land in the Philippines but we still get a lot of rain as a result of this storm. 


Wednesday 30 May 2012

Tomatoes in the patio

I planted some tomato seedlings in the garden and they were all growing so well with thick and robust stalks until they got attacked by some blight and everything had to be destroyed. Knowing that I would get the same result if I planted tomato seedling in the garden, so decided not to do it. Instead, I bought several big plastic pots at ACE hardware ( SM mall Baguio) and used these to plant the new tomato seedlings that I've sown from seeds. I had them growing in pots at the foot of the garden right in front of the rabbitry until I decided to transfer them to the patio. The sun hits the patio from 9 in the morning until 5 in the afternoon so the plants will get 8 hours of direct sunlight. I tried something different as well by using an old tea kettle with a long spout in watering the plants at the base without getting the leaves wet so they do not get diseased. I also pruned the bottom leaves so they are not touching the soil in the pot and the energy is concentrated in producing more fruits. It worked this time as the tomatoes grew well and were very productive! So from now on, I will plant my tomatoes  in the patio and I will buy more plastic pots for the next planting season.


Nothing really beats the taste of freshly picked vine-ripened organically grown tomatoes! Whenever I needed some tomatoes for my cooking or making sandwiches or pasta, I just go out and pick them right from the vine. My hubby and I enjoyed many a scrumptious meals with these tomatoes this summer. I had a good harvest of tomatoes this afternoon for making the sauce of my chicken creole recipe including a piece of bell pepper, some celery stalks and basil tops from the garden and all of these went into the pot together with my tomatoes. The result was wonderful according to my hubby who liked what I served for dinner tonight. There are still some unripened fruits in the vine but I will be gathering them soon before they get damaged by the rain. It is now the onset of the rainy season here in the Philippines so I will not be planting again until the next season. My plan is to start sowing my seeds sometime around the middle of October so I could transplant them in December. I don't have a green house yet so I could not raise tomatoes or other vegetables in the garden during the rainy season. We get a lot of rainfall here in Baguio City during the rainy season so it is best to just let the garden rest during this time. As the saying goes "time fly when you're having fun" and I did have a lot of fun with my gardening this summer.I hope you enjoy the pictures of my tomatoes.


Saturday 26 May 2012

Crop Rotation

My best friend Mary whose family comes from a long line of farmers has informed me about not planting the same kind of plant in the same location year- in and year- out so as to prevent plant diseases from building up in the soil. After I built the new additional raised bed near the outdoor aviary, I also moved the Sweet Pea trellis in this new bed. This is good practice for crop rotation in the garden. So just as I had done in the past, I placed the Sweet pea trellis nearest to the walkway where it will not cast a shade to the plants in front of it. Then I sowed some Sweet Pea seeds on both sides of this trellis. The Celery seedlings meanwhile are ready to be transplanted so I planted them next to the Sweet Peas. Since this new raised bed has never been planted before and it was rich with rabbit wastes and compost as fertilizer for the plants, all the things that were planted in this raised bed grew well and robust.  I planted the Celery seedlings close enough to each other so I did not have to blanch them as they grew. Their own leaves will serve as a shade for their stalks so they do not get the direct sunlight and this will prevent the bitter taste that most celery have when their stalks are not blanched. 

The 5-feet wide walkway is behind this Sweet Pea Trellis


Blue tanks in the background are the cooking gas tanks


Celery, Sweet Peas and Sun Flowers all growing together in one raised bed.


Saturday 12 May 2012

Adding Another Raised Bed

I got so hooked up in my gardening that I wanted to add another raised bed where I could grow more vegetables.  It's just that we do not have too much space in our small backyard so this is how I managed to gain another space to make an additional raised bed. Just above the last raised bed in the garden is a 14-inch wide cemented walkway that leads to the outdoor aviary and right beside this walkway is a flat area as shown in the picture below. Next to this walkway is a 4 feet wide and 6 feet long space where I built a temporary chicken coop and chicken run for a hen and her chicks. This hen was too aggressive to live with the rest of the flock so she had to be separated and this temporary coop and run was built for that purpose. We later transferred the hen house in another area at the back of my brother's house where they get some protection from the elements specially during the rainy season. We then covered up this vacated area with some broken clay pots and gravel as you can see in the picture below.


This vacated area is about 12 feet wide from the edge of the cemented walkway to the wall of my brother's house and it is 10 feet in length. Leaning against the wall of my brother's house is a wooden stand that is 3-feet wide at the base and tapering to 1-feet wide at the top and it is 5 feet high. This wooden stand is where we store several containers of 5-galloon  drinking water and  some cooking gas tanks. Right in front of this wooden stand is a 5-feet wide gravel walkway as shown in the picture below. Next to this walkway where the chicken coop used to stand is where I planned on making another raised bed as a new addition to the garden. So I enclosed this area with 2 layers of hollow blocks, each block is 8 inches tall. I did not have to dig up the soil in this bed because I figured that with 2 layers of hollow blocks, that will give me 16 inches of height which should be sufficient for planting some vegetables. This new raised bed is 4 feet wide by 6 feet long and 16 inches high. So with a walkway on 3 sides, it would be easy for me to reach for the plants or to do some weeding. This raised bed is next to the outdoor aviary as seen in the picture below. 


It's a good thing that we have plenty of different varieties of plants around the property so I gathered some leaves and chopped them up and put them in the bottom of this new raised bed. My hubby trimmed the Gumamela shrubs that serves as a fence in front of our property and these were all thrown into the new raised bed. Another good thing we have going for us is that we have rabbits! The green gold is priceless and we get to have them for free. So every day when we clean out the rabbitry, we throw the wastes over the shredded leaves in the raised bed and cover them up with a thin layer of compost so the flies will not have a chance to land into the wastes. We did this layering of green leaves, rabbit poop and compost soil for awhile until the compost reached the top of the first layer of hollow blocks. Time is really slow for those who wait, like me! I could not wait any longer until the bed is full because I was too eager to plant so I threw in a layer of about 4 inches thick of compost and smoothed the top and started planting.


Monday 30 April 2012

Tepee Trellis and Snap Dragon Flowers


 Would it not be nice to have a continuous supply of fresh green beans from the garden during the summer? Of course I would like that very much because nothing beats the taste of freshly gathered Green Beans from the garden. They taste so sweet when you cook them as soon as you pick them from the vines. So two weeks after I planted the second batch of Green Beans in the wire trellis, I came out with the idea of sowing more Green Beans in a tepee. We have some reed sticks that were left over from another project and they were just lying around at the back of my brother's house, so I decided to put them to good use by making a tepee trellis for the Green Beans. I gathered about 12 sticks and tied them together at the top by using a rope to form a teepee and then stuck the legs about 1-foot deep into the ground. As you can see in the picture below, there are two teepees on both ends of this raised bed and I sowed some 3-4 seeds of Green Beans around each stick.


I already harvested the Sweet Peas, the lettuce as well as the Pak-Choi that were planted in this same bed except for these Carrots because it takes about 5 months before they mature. After I harvested all the crops, the raised bed looked empty. I have always wanted to plant some Snap Dragon flowers but the plant section in the mall had nothing to sell at that time. So I visited my friend at the Baguio City Orchidarium and she didn't have any of these to sell as well. I was lucky because I found some seedlings that were for sale right next to my friend's stall and I bought some. I planted these flowers right next to the Carrots and after a couple of weeks, they bloomed! It was a pretty sight to look at and I am amazed at the life span of these flowers. They really lasted a long time that I decided to plant these again next season. I will be keeping the seeds once the flowers are spent and dried so I could sow them by next planting season and I need not buy the seedlings again.  I hope you enjoy the pictures as much as I enjoyed planting them.


Sunday 15 April 2012

Growing Celery From Seeds


The seeds of the Celery plant are very tiny. I had a bottle of Celery seeds in my pantry because I was using this before in making my bottled Green Tomato pickles. I thought that perhaps I could use the seeds to grow my own celery. So I took a spoonful of seeds and put them in a covered bottle and added some water just to cover the seeds and put the bottle inside the refrigerator for 1 day just to soften them up a little bit. Then I bought a plastic seedling tray and a potting mix from the garden section at SM mall and sowed my seeds thinly in the dish and covered this lightly with more potting soil mix. I took a big basin and placed the seedling tray inside then I poured some water in the basin, just enough to come up to about half the height of the seedling tray. By doing this, the potting soil mix will soak up the water from the bottom and this will prevent what the experts call 'damping off" of the seeds. This method will also prevent the seeds from being dislodged if I were to water them from the top. It took awhile for the seeds to grow and I was getting impatient as usual. Thinking that the celery seeds will not germinate, I took the seedling tray and dumped the whole thing inside a disposable plastic cookie container that I was going to throw out. You see, I wanted to use the seedling tray to sow another kind of seeds and I was running out of seedling trays so why not just dump the whole Celery thing and forget about it. Then one day as I was working in the yard, I noticed the Celery seeds sprouting out from the plastic cookie sheet where I dumped them to. I was really surprised by this and I just decided not to touch them and just let them grow to see what will happen. Then I realized that as they were growing, they were getting too close to each other because they got compacted when I dumped them. So I removed some of the taller ones manually and believe me, that was not easy at all because I was trying so hard to be very careful so as not to damage the roots. Then I planted the one that I pricked into individual black plastic bags and put them in the shade until they are big enough to be transferred to the ground.


Monday 26 March 2012

Companion Planting


This summer, I tried to practice companion planting by inter planting flowers and herbs in the vegetable garden. The bugs/insects will get attracted to the flowers and will leave the vegetables alone, that is the idea in companion planting. Notice how I sowed my plants in the raised bed on the right side of the walkway in the picture above. French Marigold flowers were first planted around the edge of this raised bed and this was followed by two rows of Arugula greens and then two rows of  Pak Choi, a leafy green vegetables with a thick white bottom. I often use Pak Choi in my cooking whenever I make stir-frys or in making soups. It's really delicious without the bitter taste that one usually gets in Pechay, another green leafy vegetable.   


Even the small holes of the hollow blocks that were used in making the raised beds were planted with small grasses. The root system of these plants goes down deeply and it helps to hold the hollow blocks in place.  In the photo above, you see the French Marigold flowers at the end of this raised bed. That brown triangle structure in the forefront is a home-made welded re-bar tomato cage with one tomato plant inside. In front of the tomato cages are Pack-Choi or Chinese cabbage. Behind this tomato cage is the Sweet Pea trellis. Anyway, to maximize the space and get more produce, I sowed Sweet Peas on both sides of this trellis. Planted next to the front and the back side of the Sweet Peas were lettuce of Lollo Rosso variety. Next to the lettuce facing the walkway, I sowed two rows of  Carrots.


Notice the plants in the small plot under the Green Bean trellis? Those are the Lollo Rosso variety of lettuce that we often use when making a sandwich. I made a walkway around this small plot so I could go around it when I do some weeding on the raised beds. On the left side of the Green Bean trellis is a Zucchini plant.


This is the edge of the garden where I placed the arched trellis for the Green Beans. When I removed the wire mesh fence around the old garden, I left the wire mesh on this side only so I could grow some cucumbers and sweet peas on it. Since these two plants grow in a vertical position, they could use the fence to climb onto as they grow and they could be planted next to each other as well. I also added some Pak-Choi and Petunia flowers in between the Cucumbers and the Sweet Peas.   


Thursday 15 March 2012

Sweet Pea Trellis

I often use Sweet Peas or Sugar Snap Peas in my stir-fry cooking so I thought about growing my own in the garden instead of buying them in the market. How difficult could it be to raise my own Sweet Peas right? So I looked for whatever materials that I could salvage to use in making my trellis but I could not find anything suitable for my purpose in mind. Then I had this "B-R-I-G-H-T" idea of using an old clothes stand that we have in the house! It is actually the perfect size because it may only be 4 feet wide but it's also 5 feet tall. This is made of 1-inch metal pipe materials with two welded stands and a pipe that goes across the top which holds the stands together. We only use this stand to hang the wet  clothes on hangers or for laundry during the rainy season anyway. So I thought I might as well put it to good use while it is still summer instead of it just laying around in the corner. All I had to do now is to find something that I could put across the width and the height of this structure so the Sweet Peas will have something to climb onto as they grow. Then I thought about the excess 1 x 1 inch wire mesh material that was left over after we built the chicken run and that solved my problem. So, I measured the length and width of the structure and cut the wire mesh according to size and attached this to the stand and Ta-da!  I got a Sweet Pea trellis. That picture below with the square structure is the Sweet Pea trellis and on both sides of it are the tomato cages. Well I hope you enjoy the pictures as much as I enjoyed making the trellis.


Sweet Pea Trellis


Sweet Peas ready for harvest.


Sweet Peas taller than the trellis.

Sunday 26 February 2012

Home-Made Tomato Cages


When I removed the wire fencing on three sides of the backyard garden, I also removed several steel rebars that were used as stakes to hold the wire fence in place. The size of these corrugated rebars are 10 mm and these were cut into 5-feet tall each. I am going to transfer these wire fencing in the new hill garden to ward off the chickens and the dogs from that area. The backyard garden does not really need a fence now because the chickens are already fenced in and we don't have a dog or a cat ( except for the neighbor's cat) so if I should ever decide to make a fence in this backyard garden, I would like to use a picket fence someday.  Anyway, I thought about how best to use these old rebars that I took from the fence. So after my brother finished making the beans and peas trellis, I asked him if he could make me a tomato cage using these old rebars. Since these rebars were already cut at 5-feet tall, they're just the perfect height for a tomato cage. Besides, we have 2 extra pieces of 8 mm corrugated rebars that were not used when they made the outdoor aviary. So with these materials, my brother made 2 pieces of tomato cages that are 5-feet tall. I asked him to make the tomato cages into a triangle design with two sides having rebars going across them at a 1-foot distance from the top while one side is to be left open. I wanted this open side as my access to the plants and I can always use a string on this side to hold the plants as needed.

My DH used to tie the tomatoes on a stick that was placed near the plants using the green garden ties. Sometimes, he would used jute ropes to encircle the plants around the sticks so it looks like a round tomato cage. It's just that we have to take out the ropes once the tomatoes have been gathered and that's too laborious. So now that we have this two pieces of steel tomato cages, it should make the clean up much easier with no hassle. Just pull up the cages once the season is over and it can be stored inside for safe keeping until the next planting season is here.


Wednesday 15 February 2012

The New Terraced Garden


This is what the garden looks like after I completely overhauled the old garden.  I made use of the sloping terrain to create a terraced garden with raised garden beds. This backyard garden maybe small in size but I like it much better now. By using vertical structures such as the Sweet Peas and Green Beans trellises, these increases the planting space even in a small area. Someday, I would like to put up a white picket fence gate at the entrance to the garden. The smaller potted flowers are Delphiniums while the bigger potted plants are tomato seedlings which were transferred later on in the patio near the entrance to our place. I planted Pak-Choi and Mustard greens in this new raised bed and we enjoyed many delicious fresh organic vegetables out of this garden.


The pictures below were taken from another angle just to show you the relationship between the garden and the rabbitry in the background. The first picture below was taken while standing near the Green Bean trellis while the last picture at the bottom was taken from the doorway of the rabbitry. The sitting area for the guests could be seen in the background from the rabbitry. My 4 nephews and a niece often brings home their friends because they like to show off the rabbitry and the garden. Sometimes, even the elementary or grade school pupils who have heard about our rabbitry would drop by the house after school just to admire the flowers and the gardens including the rabbits. It's a small space really but it is a delight to see other people enjoying the simple scenery. Well, I hope you enjoyed the pictures as much as I enjoyed writing about my adventures in the garden for the summer.Don't forget to visit my other blogs as well by checking out my profile.